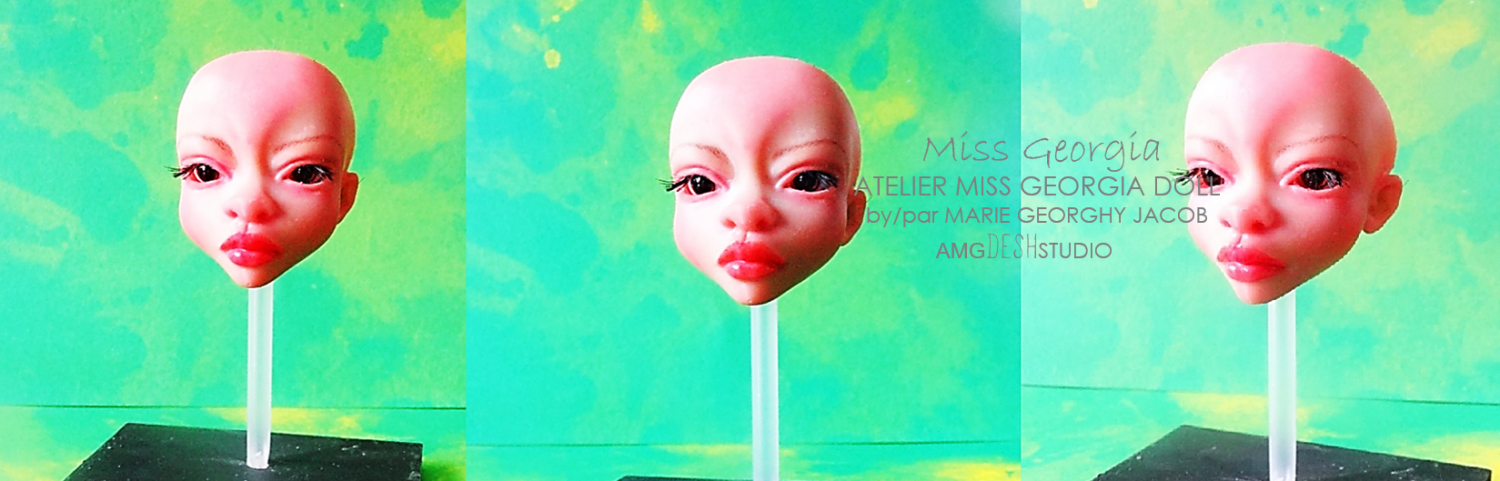
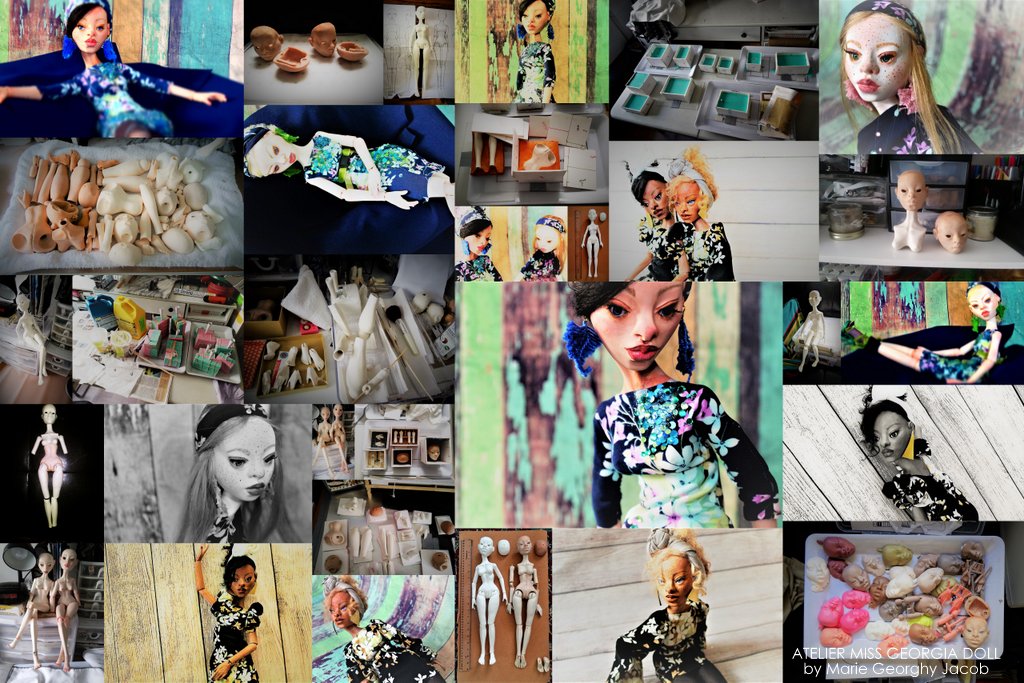
I promised myself to move on in the middle of 2020 and resin was my next challenge of choice. I was just at that stage. The steps for creating resin dolls were quite similar to those of porcelain, but less laborious. I had used the same pieces of the BDJ porcelain dolls and created others in polymer paste.
For the elaboration of silicone molds, I needed two tools: the vacuum chamber and the pressure chamber. Their functionality is different. The first, the chamber to be emptied is used to remove air bubbles in the silicone. The second, the pressure chamber, is used to reduce the air bubbles that are found in the resin. On the other hand, unlike the chamber to be emptied, this tool must work with the help of an air compressor. As you can see, expenses can be considerable.
Once the silicone molds were finished (a week of work), I still had to store them in my cabinet out of the humidity and in the shade. Then, embalmed baby powder on all molds. Next step was the casting of the polyurethane resin which hardened in three minutes! Wearing a lab coat, mask and gloves were required. In addition to the toxic smell, the resin is damaging to the skin and respiratory tract.
My first pieces made were chess! I didn’t understand anything about it. I couldn’t see what wasn’t working and something was wrong and persisting. It was then that I realized that the casting tunnels were too narrow for the circulation of the resin into liquid. The process was tricky, but fortunately my first ones were just casting tests.
Then will come, the long and laborious work of sandblasting and drilling and widening the tunnels and holes of each part of the doll. Safety was paramount! Gangs, lab coat, hair net, protective glasses and mask with filter were all a necessity! Not to mention that I needed good lighting and do it all in a well-ventilated room. The final assembly of the doll was done with elastics.
In total, it took me more than six months of work to make my first BDJ resin dolls and in total six dolls were created.
Je me suis promise de passer à autre chose vers le milieu de l’année 2020 et la résine était mon prochain défi de choix. J’étais tout simplement rendue à cette étape. Les étapes pour la création de poupées résines étaient assez similaire à celles de la porcelaine, mais moins laborieuses. J’avais utilisé les mêmes pièces des poupées BDJ porcelaine et créée d’autres en pâte de polymère.
Pour l’élaboration des moules de silicones, il me fallait deux outils: la chambre à vider et la chambre à pression. Leur fonctionnalité est différente. La première, la chambre à vider est utilisée pour enlever les bulles d’air dans le silicone. La seconde, la chambre à pression, est employée afin de diminuer les bulles d’air qui se retrouvent dans la résine. Par contre, contrairement à la chambre à vider, cet outil doit fonctionner avec l’aide d’un compresseur d’air. Comme vous le voyez les dépenses peuvent-être considérables.
Une fois les moules de silicone étaient terminés (une semaine de travail), Il me restait à les entreposer dans mon armoire hors de l’humidité et dans l’ombre. Puis, embaumés de la poudre pour bébé sur tous les moules. Prochaine étape était le coulage de la résine de polyuréthane qui durcissait en trois minutes! Le port d’un sarrau, d’un masque et de gants étaient nécessaires. Outre l’odeur toxique, la résine est dommageable pour la peau et les voies respiratoires.
Mes premières pièces réalisées étaient des échecs! Je n’y comprenais rien. Je n’arrivais pas à voir ce qui ne fonctionnait pas et quelque chose clochait et persistait. C’est alors que je réalisais que les tunnels de coulage étaient trop étroits pour la circulation de la résine en liquide. Le processus fut délicat, mais heureusement que mes premières n’étaient que des tests de coulage.
Puis viendront, le travail long et laborieux du sablage et du perçage et d’élargissement des tunnels et des trous de chaque partie de la poupée. La sécurité était primordiale! Gangs, sarrau, filet pour les cheveux, lunette de protection et masque avec filtre étaient tous une nécessité! Sans oublier qu’il me fallait un bon éclairage et réaliser le tout dans une pièce bien aérée. L’assemblage finale de la poupée se faisait avec des élastiques.
Au total, il m’a fallu plus de six mois de travail pour la réalisation de ma première poupées BDJ de résine et au total ce sont six poupées qui ont été créées.

You must be logged in to post a comment.